Photographing the Naples metro art stations: a practical guide
What is the best way to photograph Toledo metro station in Naples?
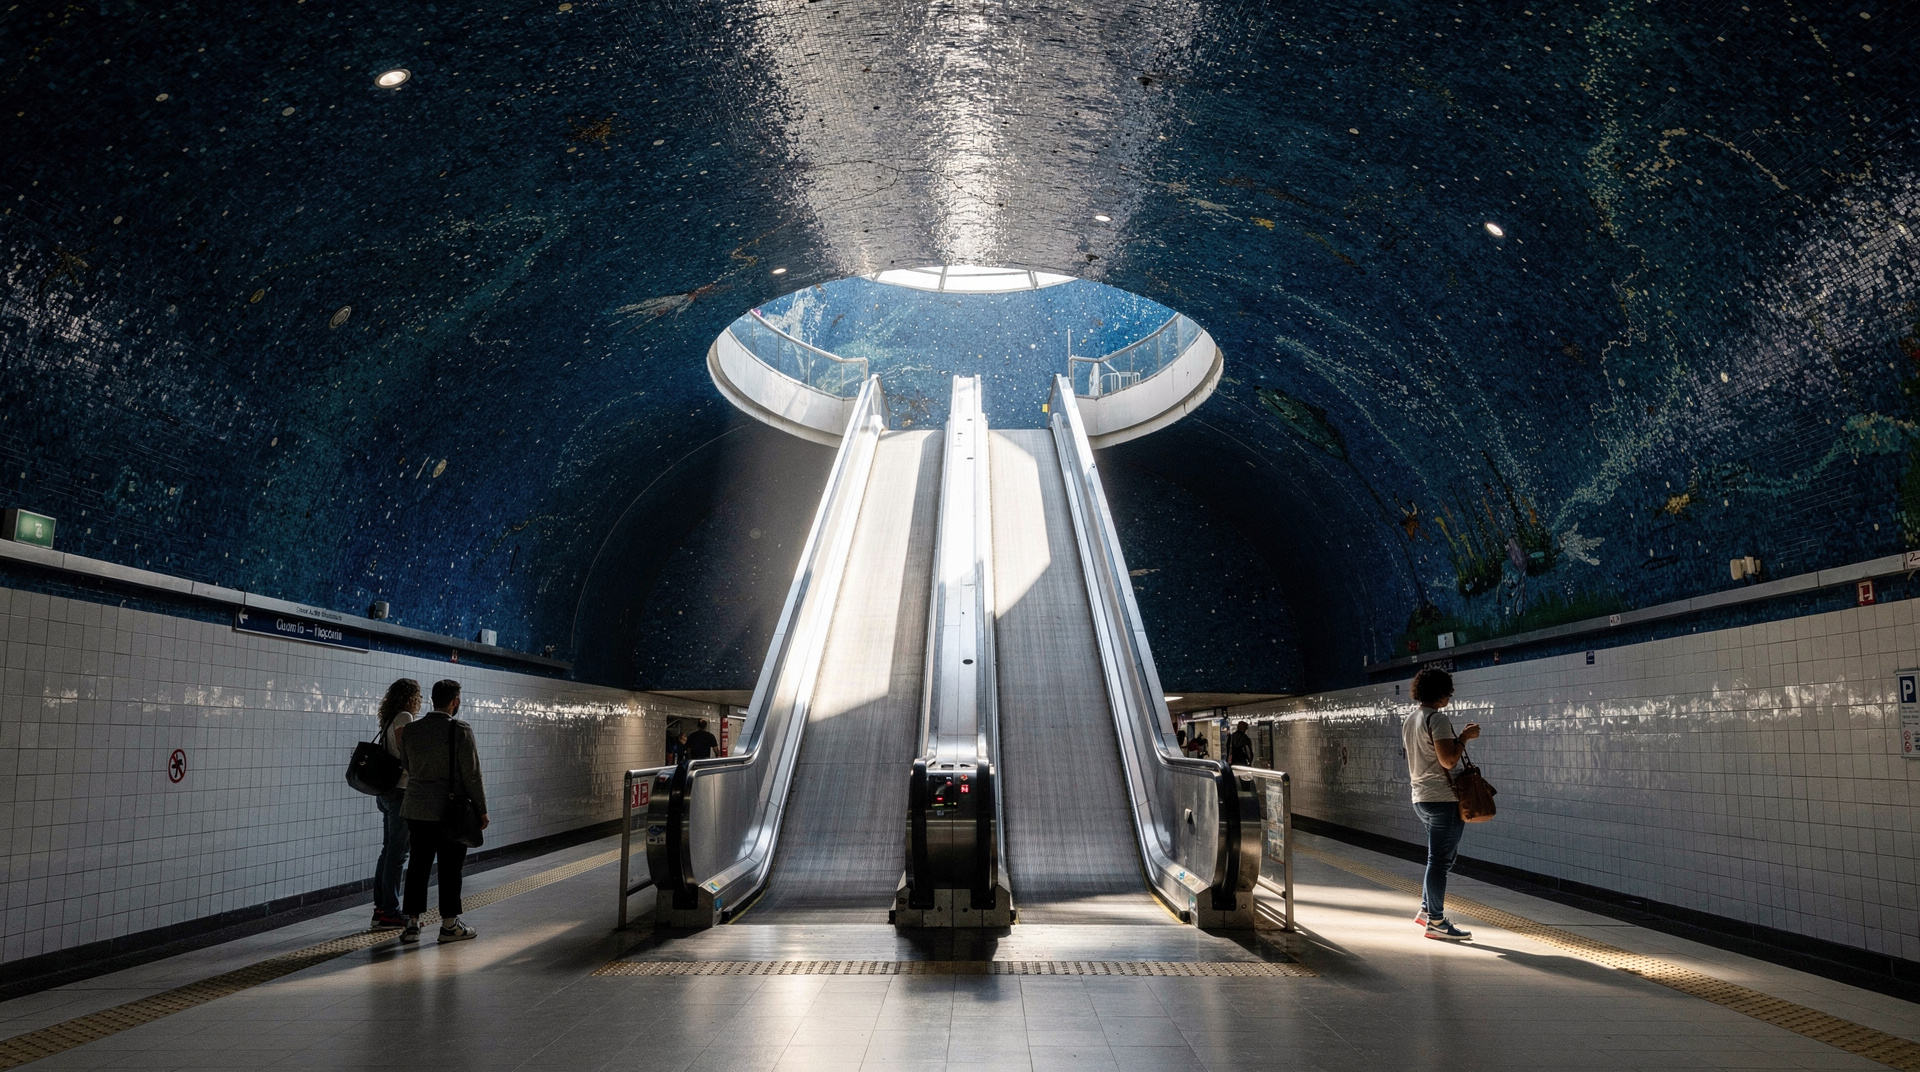
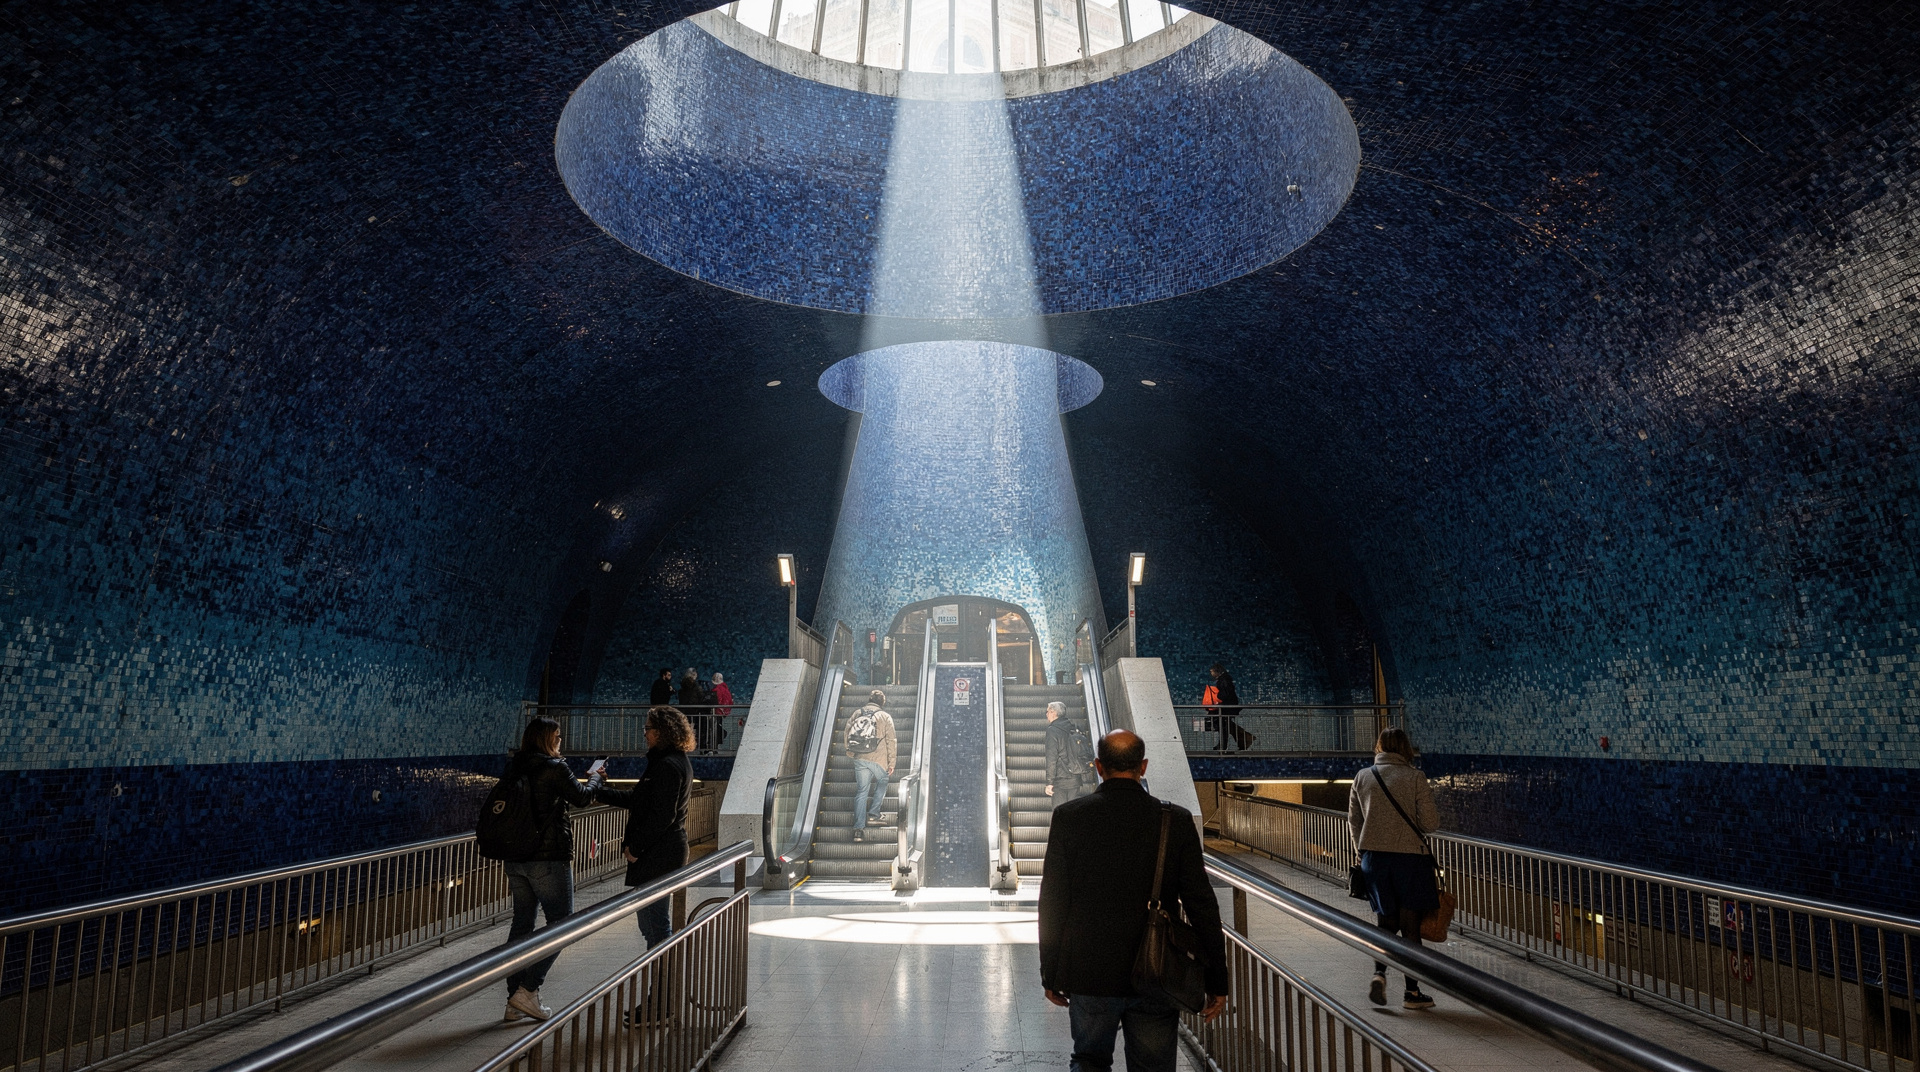
Toledo's most iconic image is the view down through the blue mosaic escalator shaft from the top, looking toward the dome. Use the widest lens you have (16–24mm on full frame) and stand at the top of the descending escalator, tilting slightly downward. The lighting is entirely artificial — rich blue LED and natural light from the sky dome — which means any time of day gives consistent results. Go between 09:00–11:00 or 14:00–16:00 for lighter passenger crowds.
| Where | Metro Line 1, mainly Toledo, Municipio, Università, Dante |
| Cost | €1.30/ride or €4.50 day pass |
| Time needed | 2–3 hours for the full station route |
| Best time | Before 09:00 or 13:30–15:30 for lighter crowds |
| Equipment | Wide-angle lens (16–24mm) essential for Toledo |
Why the Naples metro is worth a photography visit
The Naples metro art programme produced some of the most photogenic public transit infrastructure in Europe. Toledo station, designed by Oscar Tusquets Blanca with William Kentridge’s mosaic installation, has appeared in architecture magazines, travel photography competitions, and travel editorial worldwide. But it is not the only visually compelling station — Municipio, Università, Garibaldi, and Dante all offer distinct photographic material.
All of it is accessible with a €1.30 metro ticket and a phone camera. This guide covers the specific techniques, angles, and timing that make the most of each major station.
Toledo: techniques and compositions
Overview of the space: Toledo descends through three main levels — street level (ticket hall and retail), mezzanine, and platform. The dominant photographic feature is the escalator shaft connecting the mezzanine to the platform level: a deep cylinder lined with dark blue glass mosaic by William Kentridge, with a translucent dome at the top admitting natural light.
The primary composition — looking down the shaft:
Stand at the top of the descending escalator at mezzanine level. Look down the shaft. The blue mosaic curves away below you, the dome circle (admitting light) is at the top of your frame, and the escalators descend in parallel lines through the blue. Use the widest lens you have — the shaft is wide but the apparent angle from above is compressed.
Camera settings: The space is dim but not dark. ISO 800–1600 with a fast wide-angle lens (f/2.8 or wider) typically gives a 1/30–1/60 shutter speed. Stabilisation helps. If you have a very wide aperture (f/1.8 or similar on a prime), this station rewards it.
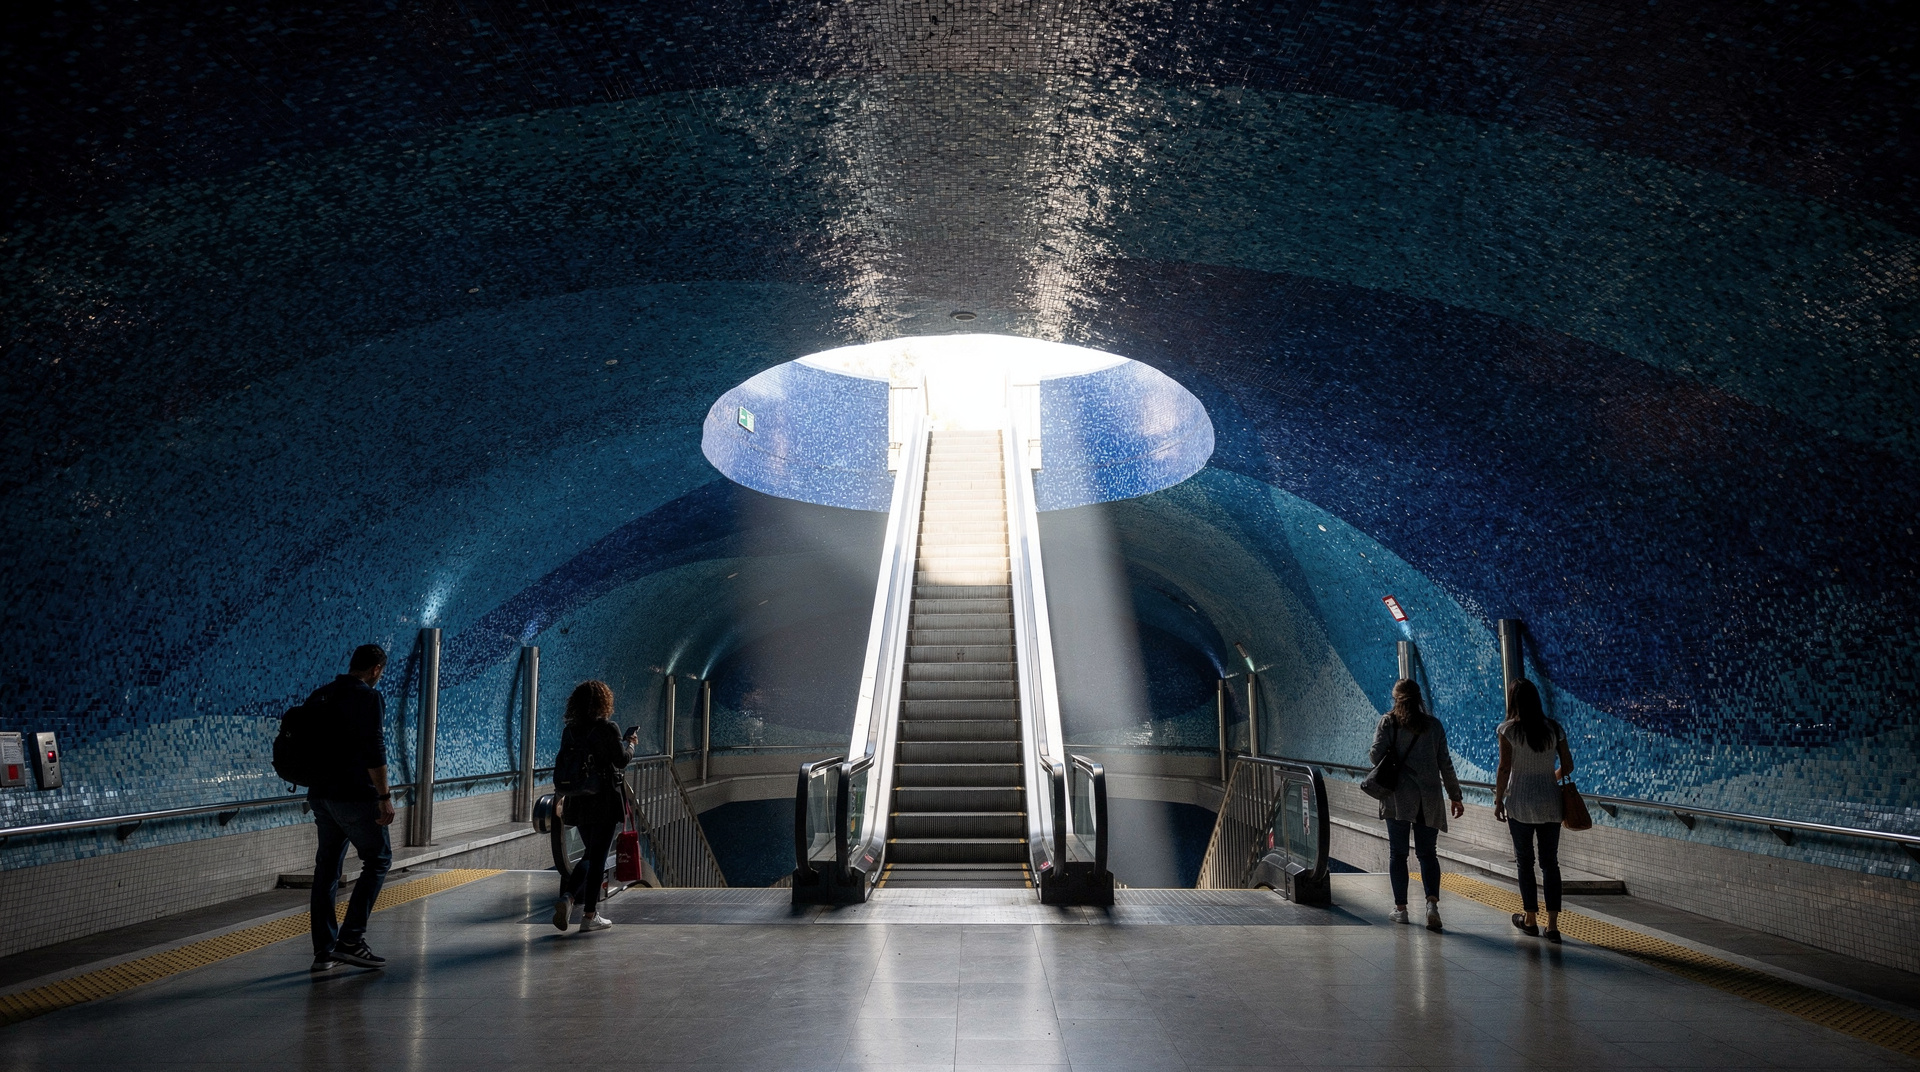
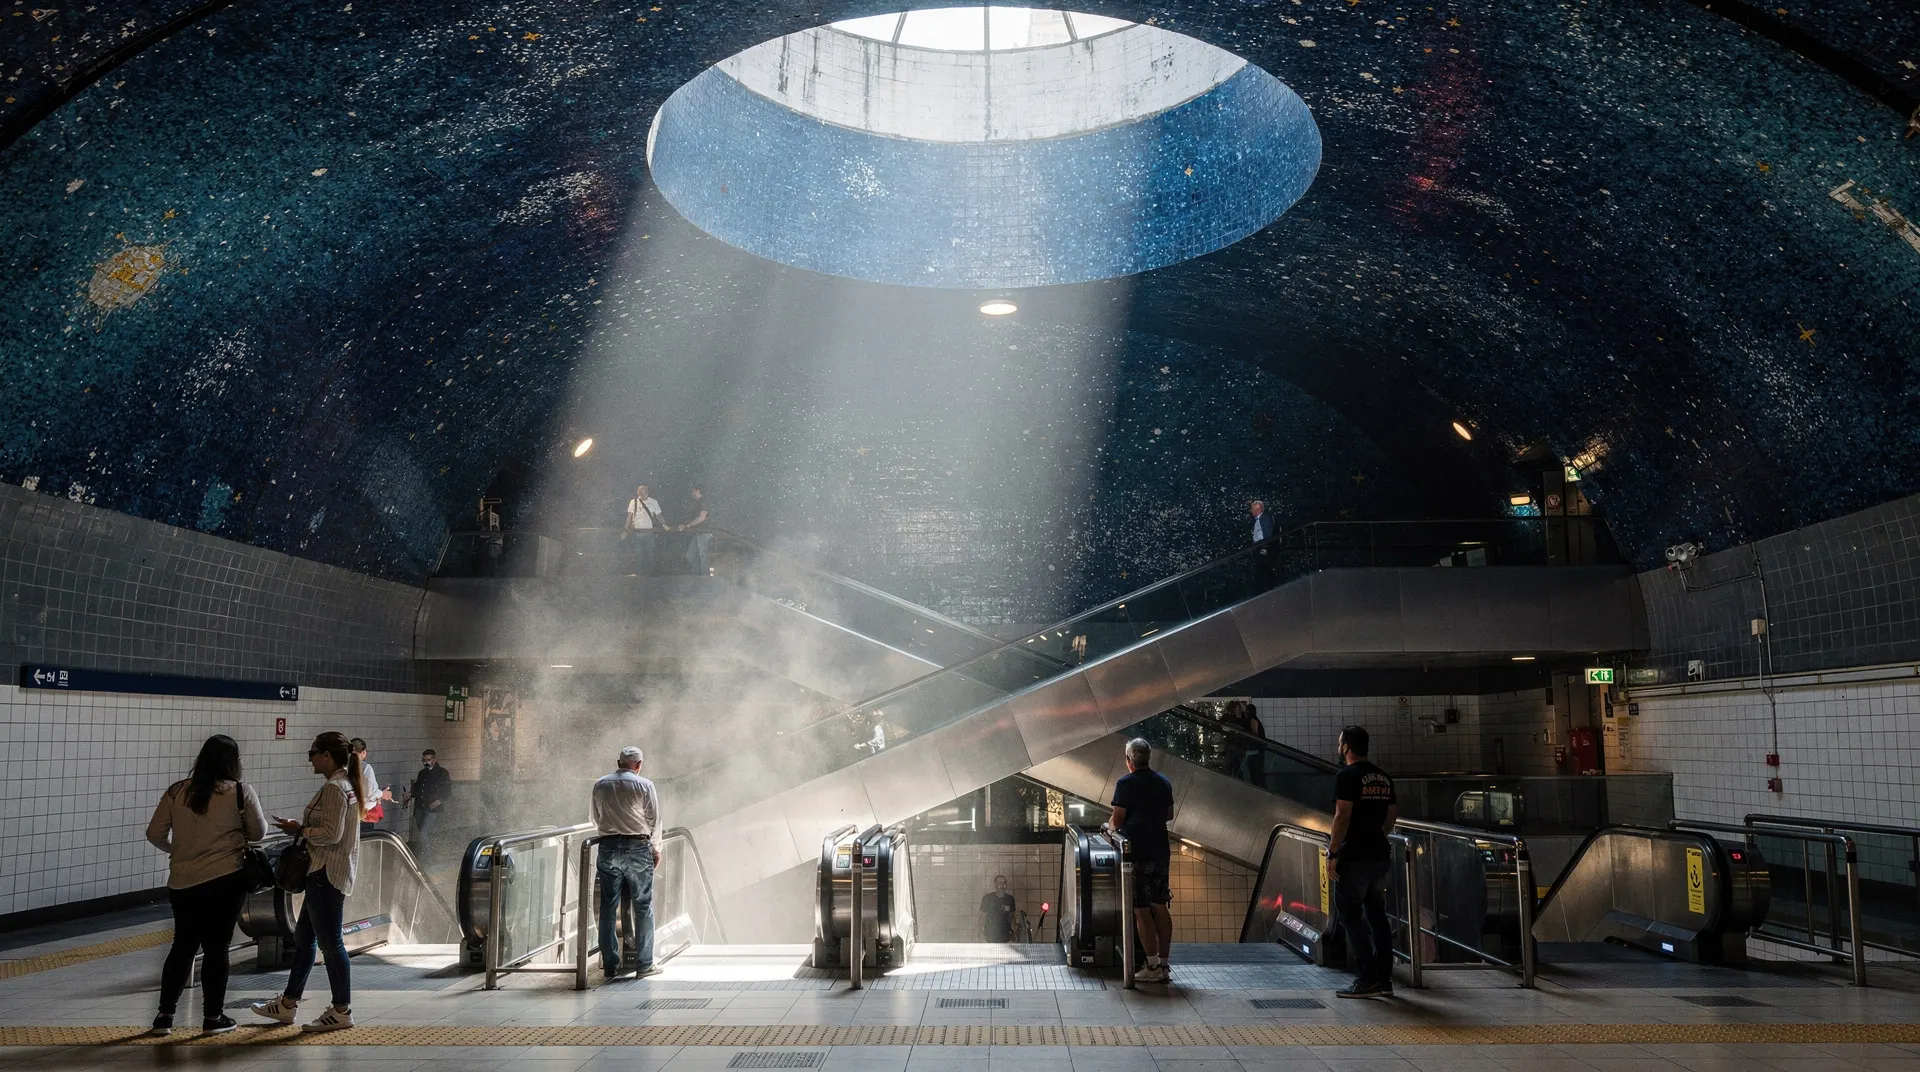
The secondary composition — looking up from platform level:
From the platform, looking up through the escalators toward the dome, the perspective reverses. The circle of natural light at the top creates a focal point. This shot works better when there are people on the escalators — human scale in the blue tunnel.
The mosaic detail:
Kentridge’s mosaic narrative covers the station walls above the escalators and around the platform concourse. These are detailed figurative scenes — not abstract — depicting episodes from Neapolitan and Mediterranean history. Photographing the mosaic at close range (85mm or 100mm equivalent) reveals the individual tile work and Kentridge’s distinctive drawing style translated into ceramics.
Timing: Toledo attracts photography visitors continuously. Early morning (07:00–08:30) before commuter traffic and before most tourists are up gives the clearest shots. From about 09:30 onward through midday, the station has a steady stream of photography visitors, which can be an element of the shot (people in blue space) or an obstacle depending on your intention.
The ticket hall level: Less photographed but worth noting — the ceiling features a light installation mapping water light. Before descending, photograph the ticket hall ceiling from below to capture this.
Municipio: archaeology through glass
Overview: Municipio station opened in 2015 after a long construction period during which Roman-era harbour infrastructure was discovered. The decision to incorporate the finds into the station created a unique hybrid: functioning 21st-century metro integrated with visible 1st–4th century Roman archaeology.
The floor panels:
At platform level, glass panels in the floor and along the walls reveal Roman stonework, amphorae, dock structures, and harbour walls exactly where they were found. The photography challenge is three-fold: shooting through glass (reflection management), capturing sufficient detail to show what the archaeology is, and providing context (showing the glass floor in a recognisable metro environment).
Technique for glass floor panels: The main problem is your own reflection. Angle the camera lens perpendicular to the glass surface and as close as possible — the closer the lens to the glass, the more your reflection disappears from the frame. A circular polariser filter reduces remaining reflections but requires manual adjustment for each angle.
Context shots: Step back and photograph the glass panel from a slight elevation, showing both the Roman stonework below and the modern tile floor and metro architecture around it. This context tells the story: ancient infrastructure visible beneath contemporary infrastructure.
Access: Metro Line 1, Municipio station. This is the stop for Castel Nuovo (Maschio Angioino) and Molo Beverello ferry port — it is often busy with travellers connecting to and from ferries. Mid-afternoon (14:00–16:00) is quieter.
Università: video and text
The Rovner floor installation:
Michal Rovner’s video installation at platform level projects or embeds moving human figures beneath a glass floor surface — the exact technical implementation is integrated into the station design. The effect is of figures moving under your feet. Photography of this requires a shutter speed fast enough to freeze the video frame (1/60 minimum, preferably 1/125 to avoid motion blur from the video cycling).
Camera settings: The floor installation is relatively bright compared to the overall station lighting. ISO 400–800, fast shutter, moderate aperture (f/4–f/5.6 for sharpness across the floor plane).
The Kosuth neon text:
Joseph Kosuth’s neon-light text works are mounted on walls and integrated into the ceiling. These are easier to photograph than the floor installation — a moderately wide lens at f/4, ISO 800, 1/60 gives a clean exposure of the neon against the darker surrounding walls. The text is in Italian — if you can read it, the content is worth understanding (Kosuth uses literary and philosophical quotations).
Dante: scale and figuration
Overview: Dante station by Gae Aulenti has works by Jannis Kounellis and Mimmo Paladino. Kounellis’s Arte Povera approach results in works that combine industrial and organic materials; Paladino’s contribution is more overtly figurative and mythological.
What to photograph: The platform level has large-scale sculptural and relief elements. A standard zoom (24–70mm or equivalent) handles the range of scales involved — from full installation shots to detail of individual sculptural elements.
The station architecture itself: Aulenti designed an interior that frames the artworks deliberately. The geometry of the station space is worth documenting alongside the art.
Access: Metro Line 1, Dante station. Adjacent to Piazza Dante — exit after photographing the station to capture the piazza’s neoclassical hemicycle in afternoon light.
Garibaldi: scale and typography
Overview: The largest and busiest station, designed by Dominique Perrault. Joseph Kosuth neon text works run along the main concourse.
Photography challenge: Garibaldi is a genuine transport hub, busy from early morning to late evening. Clean shots without crowds are only possible very early (before 07:30) or very late. The scale of the space (enormous concourse) rewards wide-angle photography.
The Kosuth texts: Positioned along the walls above head height, the neon texts read as complete sentences from below. Photograph them at slight upward angle with a moderate wide-angle (24–35mm equivalent), ensuring the text is legible in the frame.
A photography route through all key stations
If you want to cover the main art stations in one trip, this route minimises backtracking:
- Start at Garibaldi — photograph early (07:00–08:00) before commuter peak
- Ride to Università — 1 stop; photograph Rovner floor and Kosuth texts
- Ride to Municipio — 1 stop; photograph Roman archaeology floor panels
- Ride to Toledo — 1 stop; the primary destination — allow 20–30 minutes
- Ride to Dante — 2 stops; Kounellis and Paladino works
- Continue to Materdei — Sandro Chia paintings
Total time including photography: 2–3 hours. Ticket: €1.30 per entry (re-enter each time after photographing exterior or ground level).
Practical photography notes
Camera phone performance: Modern smartphone cameras (iPhone 15 Pro, Samsung S24 Ultra, Google Pixel 8) perform well in the metro stations. The primary limitation is the wide-angle lens — smartphones have ultra-wide modes but these often introduce significant distortion in geometric architectural shots. The human eye’s version of Toledo’s escalator shaft is better captured by a 16–20mm mirrorless lens.
File format: Shoot RAW if your camera supports it — the blue light of Toledo is a specific colour temperature that benefits from post-processing adjustment in ACR/Lightroom to retain accuracy.
Ethical photography: The stations are working public transport. Be aware of commuters and other passengers. Stand to the side of escalators when composing shots. Do not block platform doors.
Beyond the metro: pairing this with the rest of the art programme
If you want the fuller context behind each station’s commission — the architects, the artists, and what to look for beyond the camera lens — the companion Naples metro art stations guide covers each stop in more depth. For general orientation on tickets, lines, and timing, see getting around Naples. Photographers who enjoy the underground light of the metro often find similar appeal in the city’s funiculars, which offer a very different, above-ground perspective on the same hillside neighbourhoods, and in the best photo spots in Naples more broadly, most of which are a short walk from a Line 1 stop.
Combining a metro shoot with a walking route
A metro photography session slots naturally into a longer day exploring the city on foot. Toledo exits directly onto Via Toledo, a few minutes from Piazza del Plebiscito and the start of a self-guided walking route through the historic centre. Dante station opens onto the neoclassical hemicycle of Piazza Dante, a strong daylight photography subject in its own right and the gateway to Via Port’Alba’s historic bookshops. Treating the metro stops as waypoints on a wider photography walk — rather than a single dedicated trip — gets more value out of the same day pass.
Self-guided audio tour of Naples highlights (flexible pace for photographers)Frequently asked questions about Naples metro art photography
Can I sell photos taken in the Naples metro?
Personal use photography has no restriction. Commercial use (for stock, advertising, editorial publication) technically falls under the public art reproduction rights framework. For significant commercial use, consult ANM’s press/communications office. For travel editorial and personal photography blogs, standard fair use principles generally apply.
Is there a specific social media hashtag for Toledo station photography?
Search on Instagram for #toledometro, #metropolitanadellarte, or #metroapoli (the Napoli variant). These aggregate recent photography from the stations and show current crowd conditions, as photos are posted in near real-time.
Is the Toledo station photography accessible in wheelchairs?
The station has a lift alongside the escalators. The main photographic angles (from the top of the escalator shaft looking down) require standing at the escalator edge, which is accessible without wheelchair. The platform level Roman archaeology panels at Municipio are accessible by lift.